本文實例講述了Python實現PS濾鏡碎片特效功能。分享給大家供大家參考,具體如下:
這里用 Python 實現 PS 濾鏡中的碎片特效,這個特效簡單來說就是將圖像在 上,下,左,右 四個方向做平移,然后將四個方向的平移的圖像疊加起來做平均。具體的效果圖與說明可參考附錄說明
from skimage import img_as_floatimport matplotlib.pyplot as pltfrom skimage import iofile_name='D:/Visual Effects/PS Algorithm/4.jpg';img=io.imread(file_name)img = img_as_float(img)img_1 = img.copy()img_2 = img.copy()img_3 = img.copy()img_4 = img.copy()img_out = img.copy()Offset = 7row, col, channel = img.shapeimg_1[:, 0 : col-1-Offset, :] = img[:, Offset:col-1, :]img_2[:, Offset:col-1, :] = img[:, 0 : col-1-Offset, :] img_3[0:row-1-Offset, :, :] = img[Offset:row-1, :, :]img_4[Offset:row-1, :, :] = img[0:row-1-Offset, :, :]img_out = (img_1 + img_2 + img_3 + img_4) / 4.0plt.figure(1)plt.imshow(img)plt.axis('off');plt.figure(2)plt.imshow(img_out)plt.axis('off');附:PS 濾鏡算法原理——碎片效果
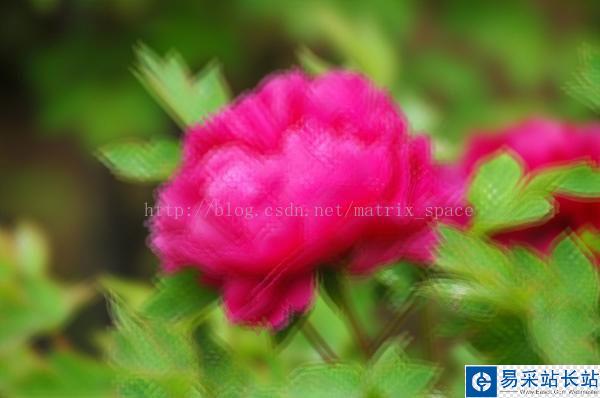
%%% Fragment%%% 對原圖做四個方向的平移,然后對平移的結果取平均%%% 碎片效果clc;clear all;Image=imread('4.jpg');Image=double(Image)/255;[row,col,k]=size(Image);Image1=Image;Image2=Image;Image3=Image;Image4=Image;Offset=5;%%% 左移Image1(:,1:col-Offset,:)=Image(:,1+Offset:col,:);%%% 右移Image2(:,1+Offset:col,:)=Image(:,1:col-Offset,:);%%%% 上移Image3(1+Offset:row,:,:)=Image(1:row-Offset,:,:);%%% 下移Image4(1:row-Offset,:,:)=Image(1+Offset:row,:,:);Image=(Image1+Image2+Image3+Image4)/4;figure, imshow(Image);原圖:

效果圖:
更多關于Python相關內容感興趣的讀者可查看本站專題:《Python圖片操作技巧總結》、《Python數據結構與算法教程》、《Python Socket編程技巧總結》、《Python函數使用技巧總結》、《Python字符串操作技巧匯總》、《Python入門與進階經典教程》及《Python文件與目錄操作技巧匯總》
希望本文所述對大家Python程序設計有所幫助。
新聞熱點


疑難解答