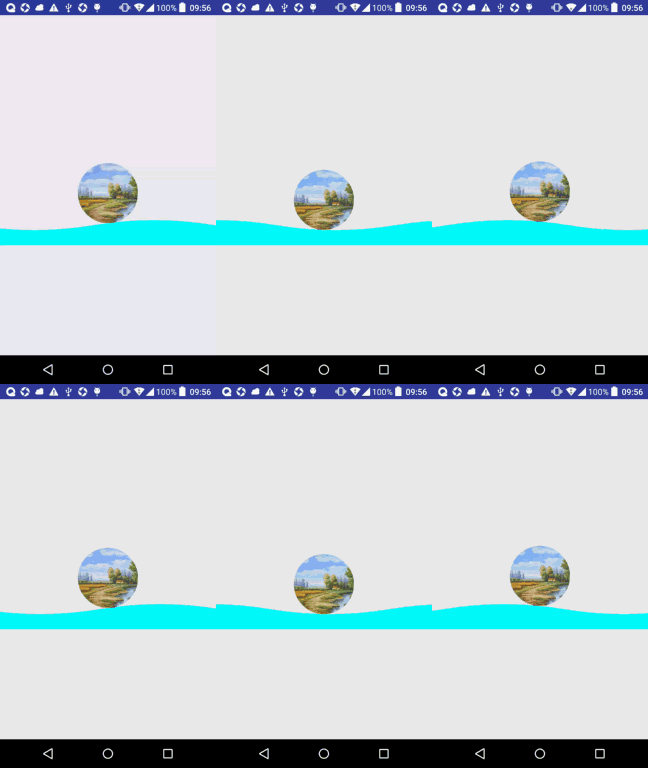
有很多app使用過水波紋的這樣的效果,看著很酷酷的樣子,所以自己就擼碼寫了一個。

實現思路:
利用貝塞爾曲線繪制圓弧(也就是水波的波紋)
通過動畫改變繪制的起始點使水波紋平移
首先,定義我們需要的自定義屬性。
<?xml version="1.0" encoding="utf-8"?><resources> <declare-styleable name="waveStyleable"> <!-- 水波紋的長度--> <attr name="waveLength" format="float"></attr> <!-- 水波紋的高度--> <attr name="waveHeight" format="float"></attr> <!-- 水波紋的速度--> <attr name="waveSpeed" format="float"></attr> <!--水波紋上方的頭像 --> <attr name="waveTopIcon" format="reference"></attr> <!--水波的顏色 --> <attr name="waveColor" format="color"></attr> <!--水波距離底部的距離 --> <attr name="distanceY" format="float"></attr> </declare-styleable></resources>
自定義view繪制水波紋控件
public class WaveView extends View { private Paint paint; private Path path; private float waveLength ; private float waveHeight ; private float waveSpeed ; private Bitmap bitmap; private int waveColor ; private int strokeWidth = 3; private Region region; private int width,height; public int translateX ; private float distanceY; public WaveView(Context context) { super(context); } public WaveView(Context context, AttributeSet attrs) { super(context, attrs); TypedArray array = context.obtainStyledAttributes(attrs, R.styleable.waveStyleable); waveLength = array.getFloat(R.styleable.waveStyleable_waveLength,300); waveColor = array.getColor(R.styleable.waveStyleable_waveColor,0x00ff00); waveHeight = array.getFloat(R.styleable.waveStyleable_waveHeight,100); waveSpeed = array.getFloat(R.styleable.waveStyleable_waveSpeed,5); distanceY = array.getFloat(R.styleable.waveStyleable_distanceY,100); Drawable waveTopICon = array.getDrawable(R.styleable.waveStyleable_waveTopIcon); array.recycle(); bitmap = drawableToBitmap(waveTopICon); initPaint(); startAnimal(); } private void initPaint() { paint = new Paint(); paint.setStyle(Paint.Style.FILL); paint.setColor(waveColor); paint.setStrokeWidth(strokeWidth); //繪制貝塞爾曲線的path path = new Path(); } @Override protected void onDraw(Canvas canvas) { super.onDraw(canvas); //繪制貝塞爾曲線 drawPath(canvas,path); //繪制wave上部的頭像 drawIcon(canvas); } private void drawIcon(Canvas canvas) { float baseLine = height-distanceY; if(region.getBounds().top==baseLine){ canvas.drawBitmap(bitmap,width/2-bitmap.getWidth()/2,region.getBounds().bottom-bitmap.getHeight(),paint); }else { if(region.getBounds().top==0){ canvas.drawBitmap(bitmap,width/2-bitmap.getWidth()/2,height-bitmap.getHeight()-distanceY,paint); } canvas.drawBitmap(bitmap,width/2-bitmap.getWidth()/2,region.getBounds().top-bitmap.getHeight(),paint); } } private void drawPath(Canvas canvas, Path path) { path.reset(); //path的起始點,向手機外多繪制一段 path.moveTo(-2* waveLength +translateX,getHeight()-distanceY); for(int i = 0; i<getWidth()+ waveLength; i+= waveLength){ path.rQuadTo(waveLength /2,-waveHeight, waveLength,0); path.rQuadTo(waveLength /2,waveHeight, waveLength,0); } region = new Region(); Region clip = new Region(); clip.set((int) (getWidth()/2-0.1),0,getWidth()/2,getHeight()*2); region.setPath(path,clip); path.lineTo(getWidth(),getHeight()); path.lineTo(-waveLength,getHeight()); path.close(); canvas.drawPath(path,paint); } public void startAnimal(){ ValueAnimator animator = ValueAnimator.ofFloat(0,1); animator.setDuration(3000); animator.setRepeatCount(ValueAnimator.INFINITE); animator.setInterpolator(new LinearInterpolator()); animator.addUpdateListener(new ValueAnimator.AnimatorUpdateListener() { @Override public void onAnimationUpdate(ValueAnimator animation) { translateX += waveSpeed; if(-2* waveLength +translateX >= 0){ translateX = 0; } postInvalidate(); } }); animator.start(); } @Override protected void onMeasure(int widthMeasureSpec, int heightMeasureSpec) { super.onMeasure(widthMeasureSpec, heightMeasureSpec); //獲取寬高模式 int widthMode = MeasureSpec.getMode(widthMeasureSpec); int heightMode = MeasureSpec.getMode(heightMeasureSpec); width = MeasureSpec.getSize(widthMeasureSpec); height = MeasureSpec.getSize(heightMeasureSpec); if (widthMode == MeasureSpec.AT_MOST){ width = (int) waveLength; } if(heightMode == MeasureSpec.AT_MOST){ height = (int) (waveHeight+ distanceY+bitmap.getHeight()); } setMeasuredDimension(width,height); } /** * dp轉化為px * @param dpValue * @param context * @return */ public float dp2px(float dpValue,Context context){ return TypedValue.applyDimension(TypedValue.COMPLEX_UNIT_DIP,dpValue,context.getResources().getDisplayMetrics()); } /** * 如果圖片底部有很多空白會導致圖片不能貼到波紋底部 * @param bitmap * @return */ public Bitmap makeRoundCorner(Bitmap bitmap) { int width = bitmap.getWidth(); int height = bitmap.getHeight(); int left = 0, top = 0, right = width, bottom = height; float roundPx = height/2; if (width > height) { left = (width - height)/2; top = 0; right = left + height; bottom = height; } else if (height > width) { left = 0; top = (height - width)/2; right = width; bottom = top + width; roundPx = width/2; } Bitmap output = Bitmap.createBitmap(width, height, Bitmap.Config.ARGB_8888); Canvas canvas = new Canvas(output); int color = 0xff424242; Paint paint = new Paint(); Rect rect = new Rect(left, top, right, bottom); RectF rectF = new RectF(rect); paint.setAntiAlias(true); canvas.drawARGB(0, 0, 0, 0); paint.setColor(color); canvas.drawRoundRect(rectF, roundPx, roundPx, paint); paint.setXfermode(new PorterDuffXfermode(PorterDuff.Mode.SRC_IN)); canvas.drawBitmap(bitmap, rect, rect, paint); return output; } public Bitmap drawableToBitmap(Drawable drawable) { Bitmap bitmap = Bitmap.createBitmap( drawable.getIntrinsicWidth(), drawable.getIntrinsicHeight(), drawable.getOpacity() != PixelFormat.OPAQUE ? Bitmap.Config.ARGB_8888 : Bitmap.Config.RGB_565); Canvas canvas = new Canvas(bitmap); drawable.setBounds(0, 0, drawable.getIntrinsicWidth(), drawable.getIntrinsicHeight()); drawable.draw(canvas); return makeRoundCorner(bitmap); }}相關類:
Path: 可以繪制二次曲線或者三次曲線到畫布上,moveTo()方法將path移動到手機屏幕的(-2* waveLength,distanceY)這個點,然后以這個點為起始點繪制二次曲線曲線,rQuadTo(),以最后點為相對位置點進行取點繪制。在屬性動畫里面,不斷改變起始點的位置,這樣繪制的水波紋就會平移。
Region:表示區域的類,通過set(path,rect)可以獲取到矩形區域與path弧線相交的新的矩形。如果rect的寬度無限小,那么獲取的矩形區域會近似為一個點,這個點就是圖片移動的y坐標。
xml文件使用:
<RelativeLayout xmlns:android="http://schemas.android.com/apk/res/android" xmlns:tools="http://schemas.android.com/tools" android:id="@+id/activity_main" android:layout_width="match_parent" android:layout_height="match_parent" tools:context="com.iwintrue.waveapplication.MainActivity"> <com.iwintrue.waveapplication.WaveView xmlns:app="http://schemas.android.com/apk/res-auto" app:waveLength = "200" app:waveHeight = "50" app:waveSpeed = "10" app:waveColor = "#0ff" app:distanceY = "100" app:waveTopIcon = "@mipmap/icon" android:layout_centerInParent="true" android:id="@+id/waterView" android:layout_width="match_parent" android:layout_height="wrap_content" android:background="#f00" /></RelativeLayout>
核心代碼就是這么多,代碼中也有解釋,關鍵的類也做了注解了。要是還有那里有疑問,多多交流哈
github地址:https://github.com/zhoukai1526/WaveApplication
以上就是本文的全部內容,希望對大家的學習有所幫助,也希望大家多多支持VEVB武林網。
新聞熱點
疑難解答