歡迎來到“實現自定義密碼輸入控件”這一章節,PasswordInputView定義了密碼輸入的監聽,支持直接在布局文件定義屬性值、支持直接獲取密碼輸入的長度、原始密碼……
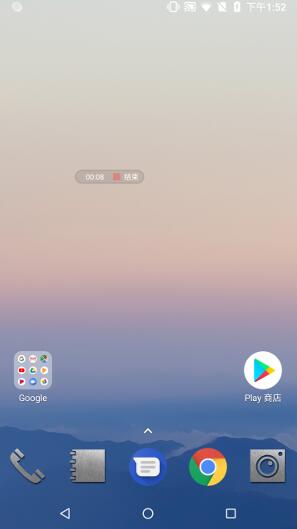
先上圖
PasswordInputView是做什么的?
PasswordInputView是一個自定義密碼輸入的控件,類似支付寶、微信支付的密碼輸入,同時定義了密碼輸入的監聽,支持直接在布局文件定義屬性值、支持直接獲取密碼輸入的長度、原始密碼等,還可以擴展其他方法,請自行實現。
實現原理
1.創建一個類 ‘PasswordInputView' ,讓其繼承EditText,因為我們要實現的自定義view是用來密碼輸入的,所以必須繼承EditText。
2.為了在布局(layout)文件(.xml)能直接定義PasswordInputView各個屬性的值,我們需要定義PasswordInputView帶AttributeSet 參數的構造方法。
public PasswordInputView(Context context, AttributeSet attr) { super(context, attr); init(context, attr);}3.在'value/attrs.xml'中定義PasswordInputView各個屬性及其類型,如:
<?xml version="1.0" encoding="utf-8"?><resources> <declare-styleable name="Passwordinputview"> <attr name="passwordLength" format="integer"/> <attr name="borderWidth" format="dimension"/> <attr name="borderRadius" format="dimension"/> <attr name="borderColor" format="color"/> <attr name="passwordWidth" format="dimension"/> <attr name="passwordColor" format="color"/> </declare-styleable></resources>
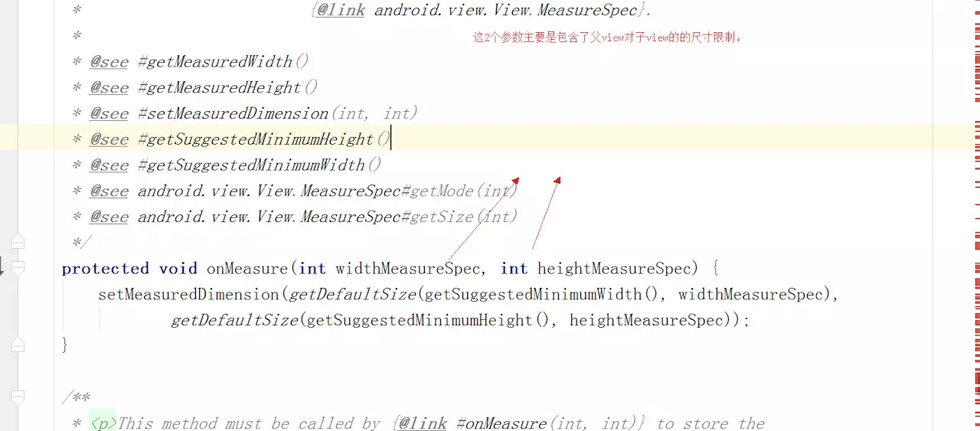
4.重載OnDraw(Canvas canvas)方法,并在其實現畫邊框、畫內容區域(以填充模式繪制Paint.Style.FILL)、畫分割線、畫實心圓點(密碼)。有人可能會問:畫了邊框、分割線,就可以了,為什么還要畫內容區域?問得好,筆者在實現過程中也碰到這個問題,當時沒有畫內容區域,導致輸入的原始內容也顯示出來了(如下異常圖),所以畫內容區域(以填充模式繪制Paint.Style.FILL)是為了掩蓋原始內容不被發現,切記必不可少。
正確代碼如下:
private void init(Context context, AttributeSet attr) { TypedArray ta = context.obtainStyledAttributes(attr, R.styleable.Passwordinputview); try { passwordLength = ta.getInt(R.styleable.Passwordinputview_passwordLength, passwordLength); borderWidth = ta.getDimensionPixelSize(R.styleable.Passwordinputview_borderWidth, borderWidth); borderRadius = ta.getDimensionPixelSize(R.styleable.Passwordinputview_borderRadius, borderRadius); borderColor = ta.getColor(R.styleable.Passwordinputview_borderColor, borderColor); passwordWidth = ta.getDimensionPixelSize(R.styleable.Passwordinputview_passwordWidth, passwordWidth); passwordColor = ta.getColor(R.styleable.Passwordinputview_passwordColor, passwordColor); } catch (Exception e) { } ta.recycle(); borderPaint = new Paint(); borderPaint.setAntiAlias(true); borderPaint.setColor(borderColor); borderPaint.setStrokeWidth(borderWidth); borderPaint.setStyle(Paint.Style.FILL); //以填充模式來畫,防止原始輸入內容顯示出來 passwordPaint = new Paint(); passwordPaint.setAntiAlias(true); passwordPaint.setColor(passwordColor); passwordPaint.setStrokeWidth(passwordWidth); } @Override protected void onDraw(Canvas canvas) { // TODO Auto-generated method stub super.onDraw(canvas); int width = getWidth(); int height = getHeight(); //畫邊框 RectF rect = new RectF(0, 0, width, height); borderPaint.setColor(borderColor); canvas.drawRoundRect(rect, borderRadius, borderRadius, borderPaint); //畫內容區域,與上面的borderPaint.setStyle(Paint.Style.FILL)對應, 防止原始輸入內容顯示出來 RectF rectContent = new RectF(rect.left + defaultContentMargin, rect.top + defaultContentMargin, rect.right - defaultContentMargin, rect.bottom - defaultContentMargin); borderPaint.setColor(Color.WHITE); canvas.drawRoundRect(rectContent, borderRadius, borderRadius, borderPaint); //畫分割線:分割線數量比密碼數少1 borderPaint.setColor(borderColor); borderPaint.setStrokeWidth(defaultSplitLineWidth); for (int i = 1; i < passwordLength; i++) { float x = width * i / passwordLength; canvas.drawLine(x, 0, x, height, borderPaint); } //畫密碼內容 float px, py = height / 2; float halfWidth = width / passwordLength / 2; for (int i = 0; i < textLength; i++) { px = width * i / passwordLength + halfWidth; canvas.drawCircle(px, py, passwordWidth, passwordPaint); }}5.定義“設置屬性值”的方法,如下
public void setBorderWidth(int borderWidth) { this.borderWidth = borderWidth; borderPaint.setStrokeWidth(borderWidth); postInvalidate();}動態圖
項目源碼
以上就是本文的全部內容,希望對大家的學習有所幫助,也希望大家多多支持VEVB武林網。
新聞熱點


疑難解答