前言
在Android中要實現底部彈出菜單很容易,有專門的PopupWindow類,我們只需要用xml訂制好其內容View以及設置其彈出位置即可,非常容易。但是,在ios中就不能這么直接了,沒有現成的東西,需要自己想辦法來實現。
思路分析
具體實現
UI
用Interface Builder實現,ViewController直接選用UIViewController,內部選的是UICollectionView方便動態更新,當然這個根據需要隨意。布局用AutoLayout就不用多說了,比較簡單。直接上圖:
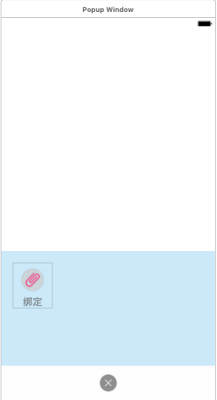
注意此ViewController的RootView就是我們需要添加到Window的view,為了效果,將其背景色置為clearcolor。將其中交互的組件右鍵拖拽到PopupWindow類形成映射。
彈出
將RootView添加到Window中,并顯示在最前面。直接上代碼:
func create()-> PopupWindow { let window = UIApplication.shared.keyWindow window?.addSubview(self.view) window?.bringSubview(toFront: self.view) self.view.frame = CGRect(x: 0, y: UIScreen.main.bounds.height, width: UIScreen.main.bounds.width, height: UIScreen.main.bounds.height) UIView.animate(withDuration: 0.3) { animation in self.view.frame = CGRect(x: 0, y: 0, width: UIScreen.main.bounds.width, height: UIScreen.main.bounds.height) } return self }這里關鍵就是addSubView方法添加到Window,bringSubView顯示到前臺。UIView動畫將view的y坐標由屏幕高度改變為0,從而實現由底部彈出效果。
這里返回自身對象是為了方便鏈式設置組件屬性和其他屬性。
添加交互功能
雖然現在已經可以彈出PopupWindow了,但并不具有交互功能。并且我們為了便于復用,不會把交互的功能直接寫在PopupWindow中,而是根據需要寫在調用它的地方。這里有兩種方式:
兩種方式一般都可以隨性,但第一種適合交互函數比較多的時候。第二種適合于同一調用類中出現多個地方不同調用,一些設置屬性也不相同。
我們這里選擇第一種,以協議的方式:
protocol PopupWindowDelegate { func attach() func detach() func rename() func delete() func control()}這里具體函數完全不用管它,是從項目中截取的。
當然我們需要在PopupWindow中定義一個該協議類型的變量:
public var delegate: PopupWindowDelegate?
通過協議對象來調用交互函數:
func collectionView(_ collectionView: UICollectionView, didSelectItemAt indexPath: IndexPath) { let row = indexPath.row switch itemsString[row] { case "attach": delegate?.attach() cancel() case "detach": delegate?.detach() cancel() case "rename": delegate?.rename() cancel() case "delete": delegate?.delete() cancel() case "control": delegate?.control() cancel() default: break } }這是UICollectionView item的選擇函數,這里不多說。注意協議對象對其函數的調用,這里只相當于一種綁定。真正的調用在調用地方對協議對象的賦值。
除了這些還有一個最重要的東西,就是聲明對于PopupWindow對象的一個強引用,如果這個不存在,交互功能依然不可用。原因是為了防止當前對象被回收掉,有了強引用,只有強引用置空時,對象才能被回收掉。
var strongSelf: PopupWindow?
引用賦值即可以放在彈出函數create()中,也可以放在viewDidLoad()中,執行順序是彈出函數create()在前。這里放在viewDidLoad()中的:
override func viewDidLoad() { super.viewDidLoad() // Do any additional setup after loading the view. self.view.backgroundColor = UIColor.init(white: 0, alpha: 0) let gesture = UITapGestureRecognizer(target: self, action: #selector(cancel)) gesture.delegate = self self.dismissView.addGestureRecognizer(gesture) self.collectionView.delegate = self self.collectionView.dataSource = self strongSelf = self }里面對于UICollectionView的操作可以忽略,dismissView是取消PopupView的按鈕,當然并沒有用UIButton,用的是UIView,所以要手動添加點擊事件。
取消
取消PopupWindow比較簡單,將view從其容器中移除,并將其強引用置空。為了實現從底部消失的效果,仍然用UIView動畫變換y坐標實現。
func cancel() { UIView.animate(withDuration: 0.3) { animation in self.view.frame = CGRect(x: 0, y: UIScreen.main.bounds.height, width: UIScreen.main.bounds.width, height: UIScreen.main.bounds.height) } DispatchQueue.main.asyncAfter(deadline: .now()+0.3) { self.view.removeFromSuperview() } strongSelf = nil }調用
在調用類中實現PopupWindowDelegate協議,重寫交互函數。創建PopupWindow對象,并設置委托屬性和其他屬性。
let popupWindow = UIStoryboard(name: "DefiniteUI", bundle: nil).instantiateViewController(withIdentifier: "popup") as! PopupWindowpopupWindow.delegate = selfpopupWindow.create().setItems(value: items)
效果
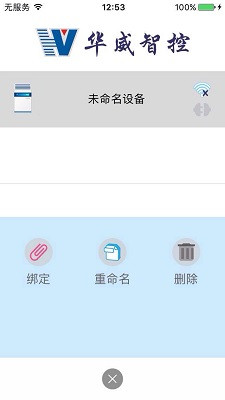
彈出PopWindow:
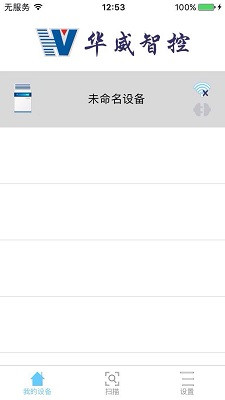
取消PopWindow:
后記
舉一反三,除了PopupWindow,類似的各種自定義的Dialog都可以這樣去實現,讀者可以去試試。以上就是本文的全部內容,希望對大家的學習有所幫助,也希望大家多多支持武林網。
新聞熱點


疑難解答